


A bookmark link is similar to a hyperlink, except that it moves the viewer to another area in the report instead of linking to a web page. You can add bookmarks in a two-step process:
- Identify the place (target control) where you want to allow a user to jump to with the help of a Bookmark ID.
- Share that Bookmark ID with another control that links to the target control.
Use the following steps to create a Bookmark ID on a Textbox control which functions as the title of the report page and create a bookmark link on another Textbox control at the bottom of the page.
These steps assume that you have already added a Page Report template to your project. See Adding an ActiveReport to a Project for further details.
To add a Bookmark ID on a control
Bookmark ID is like a URL that provides information required by the report viewer to locate the report control. You need to provide a Bookmark ID for any control to which you want to allow users to jump to via a Bookmark Link.
- From the Visual Studio toolbox, drag and drop a Textbox control onto the design surface.
- Select the Textbox to view its properties in the Properties window and enter any text in the Value property (For e.g., Top).
- Click the Property dialog link below the Properties window to open the Textbox dialog.
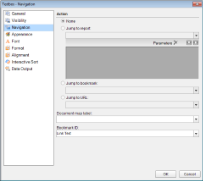
- In the TextBox dialog that appears, select the Navigation page and in the Bookmark ID field enter text like Link Text.
- Click OK to close the dialog.


 |
Tip: You can also set the Bookmark ID through the Bookmark property in the Properties window. |
To set a bookmark link
Bookmark Link is a simple link you create to jump to the location where the Bookmark ID is set. You can only set a bookmark link on a Textbox or an Image control.
- From the Visual Studio toolbox, drag and drop another Textbox control onto the design surface. Place it at the bottom of the page for this example.
- Select the Textbox to view its properties in the Properties window and in the Value property enter Go to Top.
- Click the Property dialog link below the Properties window to open the Textbox dialog.
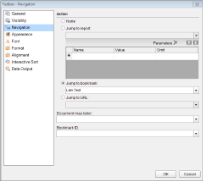
- In the Textbox dialog that appears, click on the Navigation page and select the Jump To Bookmark radio button to activate it.
- Under Jump To Bookmark, enter the same text (i.e. Link Text) you assigned as Bookmark ID in the steps above.
- Click OK to close the dialog.
- Go to the Preview Tab, and click Go to Top.
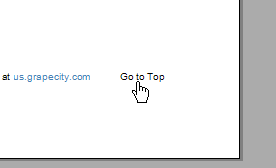
You move to the top of the page where the Bookmark ID was set on the control.
|
Tip: You can also access the Navigation page of a control to set the bookmark link through the ellipsis button next to the Action property in the Properties window. |
 See Also
Concepts
Interactive Features